Terrarium Set-up Basics
We are often asked what is the best way to set up a terrarium. There are many different opinions on how this should be done, however, we feel that a terrarium should have several features: 1) Be relatively easy to maintain with minimal disturbance to the animals, 2) Be as natural looking as possible, 3) Be easy to construct and 4) Be a healthy environment for the animal. Following are some guidelines for assembling such an environment. Please remember that the key areas discussed below represent the basic elements of all terraria even though the specific items used for specific habitats may differ.
1) Background
Whether or not to use a background will be the first question you should ask yourself. Backgrounds can provide a very natural appearance while concealing unsightly wiring, etc. If you choose not to use one, simply skip this step. Some of the most popular are Tree Fern, Cocos Panels, Coco Fiber, Habi-Scape simulated rock, and Cork Bark. These can be secured to the rear of the tank using clear silicone or aquarium sealant, however, some people will opt to use other methods. Just set the terrarium on its side and allow the silicone to cure overnight before moving on to the next step. If you have chosen Cork flats, they can be cut and trimmed to size relatively easily. These pieces may not be completely flat so it would be best to tuck Coco Fiber loose fill behind them, filling the cracks so animals or feeder insects wont find their way behind them.
2) Base Layer
Every terrarium needs to have drainage in order to keep the plant life healthy and productive, as well as preventing the substrate from culturing harmful bacteria. Over-watering is the leading cause of plant death so it is most important to remember that excess water needs a place to drain to and keep the soil from becoming saturated or soggy. The water line in the gravel should always be at least Â― inch below the soil substrate. By virtue of capillary action, this water will slowly wick its way back into the soil offering moist conditions for the plants while the rest can evaporate, and will provide humidity as necessary.
In the past, gravel was a popular choice for this but it adds a tremendous amount of weight to the terrarium while providing only limited drainage and air spaces under the substrate. Charcoal was also used as it adsorbs impurities from the soil as well as provided some drainage, however, it also will start releasing those impurities back out into the soil once it has adsorbed all that it can. We have a new product available called Terra-Lite that performs the job much better. It is a very lightweight expanded clay pellet that is used in place of gravel. It does not add much weight to the bottom of the terrarium, it's large particle size provides superb drainage and air space and it does not decompose or alter the pH of the substrate. This is the first layer of the terrarium and should be between 1"- 2" thick.
3) Substrate Divider
On top of the base layer, a substrate divider should be used. We offer this cut to size or you can use woven nylon shade material or fiberglass window screen cut to the dimensions of the tank and placed between the base layer and substrate. The use of this is important to prevent the substrate from settling and sifting down into and clogging the base layer.
4) Substrate
Many different mixes and soils have been used over the years but most have had problems with holding too much moisture, having unwanted ingredients or simply not lasting more than a few months. We have found our Co-Co Bedding to solve all of those problems. Made from ground coconut fiber, it offers excellent drainage while still being moisture retentive. It is much more long lasting than peat moss based mixtures and will last up to five years. This can be used by itself or can be mixed with tree fern fiber for even greater drainage and aeration if conditions will be very wet. Additionally, we offer an organic fertilizer or safe liquid fertilizer that can be used (sparingly) to make the mix more nutritious for the plants. The thickness of this layer will vary depending on what types of plants you will be growing as well as the contour of the layout you desire. It should be at least 1"-2" deep and can be sloped up into hills and valleys to add interest.
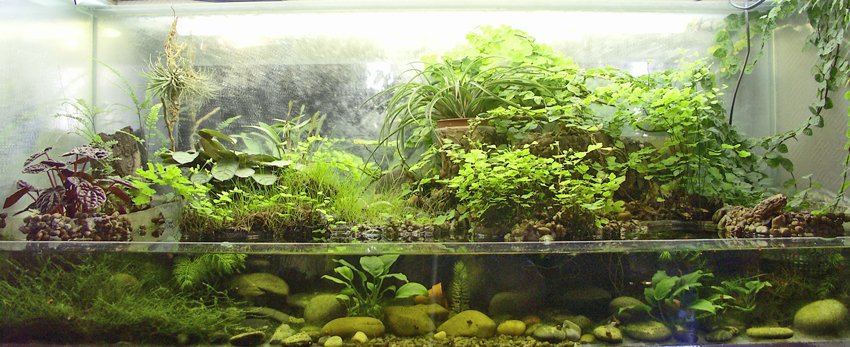
5) Landscaping
This is where you get to really start using your imagination and having fun. Wood will often serve as a focal point but will also function as climbing, hiding or basking areas for your herps or mounting areas for epiphytic plants (air plants). There is an incredible variety of wood and rock that can be used although some types are more suited for use in certain conditions than others. While most types of wood will do fine in medium to low humidity tanks with good ventilation, the choices are more narrow when dealing with moist, humid ones. Grape wood for example, although most widely available, will most likely mold and fungus quickly in humid and wet habitats. We have found that some of the best choices for these set-ups include Cypress, Ghost Wood and Cork. Be creative when landscaping the terrarium.
Multiple levels of ground area can be created using cork or other wood to form berms or terraces. These can then be planted with trailing and creeping plants to add interest. Keep the scale and perspective of the scene in mind during the entire process. Using one medium piece of wood along with 2 or 3 additional small pieces of the same type creates a much more natural look than just one large piece or mixing too many types of wood together. Try to have an idea of what you want the finished tank to look like before you start but then let the pieces you use tell you how they best work together. Remember, nature is random!
6) Plants
The types of plants you use will depend, in large part, on the type of habitat you are trying to create (desert, temperate, rainforest, etc.), as well as what size of terrarium you are building and what type of animal you will be keeping. Again, it is important to keep the scale of the display in mind when choosing and siting plants. As a rule, larger plants are used in the rear of the tank while shorter ones are planted in the foreground. Trailers and creepers are best displayed where they can spill over terraces or logs. Climbers look their best when sited to grow up backgrounds and vertical pieces of wood. A good balance of both terrestrial and epiphytic species usually creates the best display but avoid using too many different types together in a smaller tank. Using a few individual "feature" plants accompanied by multiple plantings of just a couple "filler" species looks more natural than using one each of everything. It is best to "dry fit" the plants while still in their pots before actually planting them.
Once you are happy with their placement it is a simple matter of making a hole in the substrate large enough to accommodate the root-ball, removing the plant from the pot and placing it in the prepared hole. Fill in around the plant and press it firmly into the substrate. Sometimes the substrate may not be deep enough to fit the root ball of the selected plant in the particular area you want to place it. There is a way around this. First, remove the plant from the pot. Then, starting at the bottom of the root-ball, use a sharp knife to carefully make a cut vertically up into the root-ball, stopping about 2/3 of the way up. Gently peel the two halves away from each other while still keeping the whole root system intact and set into the previously prepared hole. This will allow you to reduce the depth of an average root-ball coming out of a 3" pot from about 2.5" tall to about 1" tall.
7) Accents
In most cases, the difference between a nice terrarium and an incredible terrarium is in the use of accents. Lichens, mosses, mushrooms and other accent items, even though very small, play a very large part in completing the illusion of a miniature nature scene. Keep in mind, however, that many accent items do not hold up that well in wetter habitats. In nature, there are always bits of leaves, twigs, lichens or other bits of debris to break up the lines and add interest and shadow. Often, terrariums are left looking too sterile or "clean". Lichens are one of the most easily used accent items that can really help add the finishing touch. The longer, stringy types can simply be draped over branches or vines and even on the background. Additionally, they can be glued with a tiny spot of hot glue to help keep them in place. Again, try to be random and natural. Use varying lengths in different areas and if glue is used pay special attention to hide it. It is usually a good idea to use only one or two types of lichen per terrarium. Using more than this will result in too "busy" of a look. A few mushrooms can also be used affixing them with hot glue or silicone into natural positions in small groups with a few singles. Accent items should always be used but not in too great an amount. Remember that they are meant to just draw the eye a little here and a little there, not make it focus on one spot or give you a headache trying to take it all in!

Lighting
Lighting is one of the most important aspects of terrarium construction. All too often, spectacular results are allowed to dwindle due to insufficient lighting. We have found that in most cases, two fluorescent bulbs that run the full length of the tank are much better than one. If a single bulb is used, try to find a brand that has an "aperture" on the bulb where most of the light is reflected out of one side. One of our favorites is the LifeGlo by Hagen. Spectrum is not so important to the plants as it is to the animals. There are bulbs on the market that accent the red and blue ends of the spectrum and are designed for use with plants but I rarely use them. If I do use them it is always in combination with another full spectrum bulb. The reason is that while the bulbs do help plant growth they are far too dim on their own, plus they skew the color appearance of everything in the tank to look purple. In most cases, full-spectrum bulbs will work fine. Light should be provided for 12 to 14 hours a day. An automatic timer is a great help in keeping the cycle steady.
9) Temperature
Also important is temperature. Most terrarium plants will do just fine in average household temperatures and will not need additional heating unless the temperature is going to fall below the upper sixties for very long. Remember too that even fluorescent lights will add some heat to the tank. Some plant species will need defined rest or dormancy periods where temperatures and moisture levels will need to be adjusted. Obviously these plants would need to be removed in order to accommodate this.
10) Humidity
Humidity will be achieved by balancing moisture and ventilation. This usually takes a little trial and error at first but it is important to remember that most plants need proper ventilation to prosper. We usually use a top that is either all screen or partly glass and partly screen. The screened areas can be reduced by adding a piece of plastic or glass over the top. You can place a humidity meter in you terrarium to monitor the humidity while testing. Some testing and adjustment may be necessary to meet your target humidity range. As mentioned earlier, be very careful not to over water and saturate the soil substrate while attempting to increase the humidity.
The final, and most important, point to remember when creating your terrarium is to make it yours. The suggestions and guidelines that I have offered here are just that. This is something that you will be looking at day after day so make sure to use things that appeal to you. I once set up a large terrarium for a customer several years ago that followed this same natural design. When I returned to his office a few days later to drop something off, to my surprise, I found that he had placed a Superman action figure standing in the middle of the rainforest I had just created. While this did not really fit into the "scene", it definitely made the terrarium his.